Supported Standing Hip Flexor Stretch
Standing (chair) · Front of the hip
A self-stretch for the front of the hip. Support your body and stay within a comfortable range.
How longNew to it: start with 10–20 seconds, once or twice. Used to it: 20–30 seconds, 2–4 times, about 60 seconds in total per stretch.How long and how many →
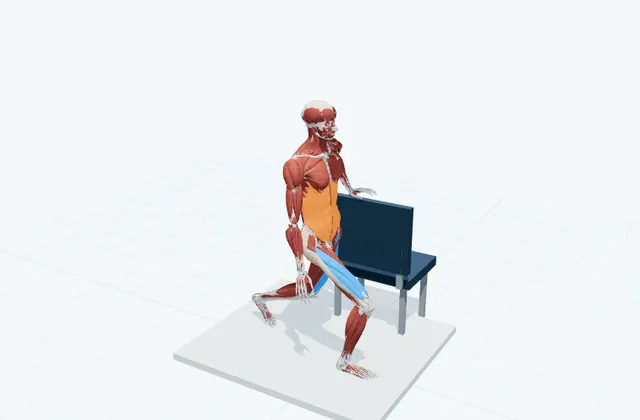
Position and focus
Standing (chair) · Front of the hip
Starting position
Place a chair beside you and hold the backrest with one hand. Take a long step so that one foot is well in front of the other, and lift the back heel.
Movement phases
1. Stagger the feet
Press the floor with the front half of the back foot and face the pelvis forwards.
2. Lower your hips
Keeping your buttocks gently squeezed, bend both knees and lower your body.
3. Hold the stretch
Stop where you feel a stretch at the front of the hip on the back-leg side.
4. Return
Press the floor with the front foot and straighten the knees.
What to check yourself
Check that the front knee is not falling inwards and that your lower back is not arching.
Adjust the stretch
Easier: Take a shorter stride and keep the back heel on the floor.
Deeper: Keeping the back long, press the pelvis a little forwards and lower the hips.
Caution
Stop if you feel sharp pain, numbness, dizziness, shortness of breath or anxiety. If you are receiving treatment, recovering from surgery or pregnant, check with your healthcare professional first.
These English notes describe a prototype model. The stretch, foam roller and resistance band lessons are being produced under the supervision of CoconeRu. Move, reviewed in stages. They are not medical advice or an individual exercise prescription.
References
Each note describes what the whole source covers.
Kent Community Health NHS — Stretching exercises ↗
Calf using a wall (knee straight and bent), back of the thigh lying down and using a step, front of the thigh supported by a wall, and front of the hip in half-kneeling.
This lesson was put together for this site from the methods for the same area in the sources above. It has not yet been reviewed by an expert.
About this page
It shows a typical way to do the movement. The 3D is a schematic model; it does not decide whether a lesson suits you, prescribe exercise or diagnose anything. Stop if you feel pain or discomfort.
Sources, supervision and revisions