Supported Shoulder Internal Rotation
Supine · Shoulder external rotators and posterior tissues (stretched into internal rotation)
An assisted stretch for the shoulder external rotators and posterior tissues (stretched into internal rotation), observing contact, stabilisation and compensation separately.
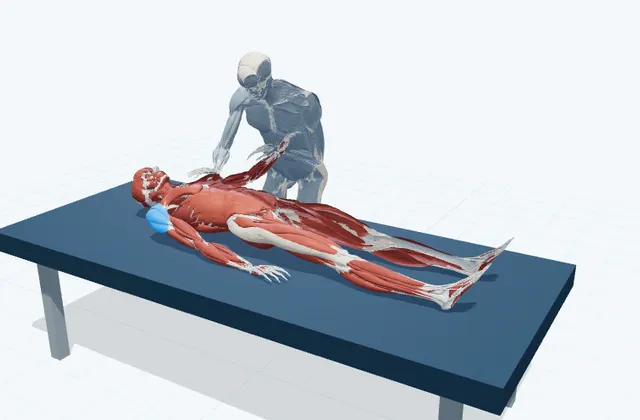
Position and focus
Supine · Shoulder external rotators and posterior tissues (stretched into internal rotation)
Starting position
The client lies supine with the left arm out to the side at 90 degrees, the elbow bent to 90 degrees and the forearm pointing towards the ceiling. The trainer places the hands on the forearm and the front of the shoulder.
Movement phases
1. Support the arm
Lightly hold the front of the shoulder so it does not lift.
2. Rotate towards the feet
Rotate the forearm towards the feet, using the upper arm as the axis.
3. Check the response
Check for a stretch at the back of the shoulder and any lifting at the front of the shoulder.
4. Return the forearm
Return the forearm to point towards the ceiling.
What the trainer checks
Check that the front of the shoulder is not lifting.
Trainer information
Trainer position
Stand on the client's left (the side shown in the 3D) with your feet apart front to back, at a height that suits the table. Move by shifting your body weight rather than holding with the arms alone.
Contact and support
Press the forearm (near the wrist) with the palm and hold the front of the shoulder with the other hand.
Stabilisation
Lightly press the front of the shoulder towards the table.
Compensation
Forward lifting of the shoulder, shifting of the elbow position.
Easier option
Reduce the range and let the weight of the leg or arm rest on a cushion or the table. Go back to checking a pain-free starting position.
Cues and consent
Tell the client where you will touch and which way you will move, and say, 'Tell me straight away if you feel any pain or discomfort.' Confirm consent before touching and before moving.
Stop criteria
Return to the starting position immediately if the client reports sharp pain, numbness, weakness, a pinching feeling in the joint, dizziness, shortness of breath or anxiety, or asks to stop.
The sources include material for clinicians and carers. This 3D is not yet fully reviewed as a studio procedure and does not replace hands-on training. Do not perform unfamiliar techniques from the 3D alone.
Caution
Work within your qualifications, contract and studio procedures, and check medical history, medication and any pain before starting. This is not a substitute for diagnosis or treatment. Do not perform unfamiliar techniques from the 3D alone.
These English notes describe a prototype model. The stretch, foam roller and resistance band lessons are being produced under the supervision of CoconeRu. Move, reviewed in stages. They are not medical advice or an individual exercise prescription.
References
This lesson was put together for this site. It has not yet been reviewed by an expert.
About this page
It shows a typical way to do the movement. The 3D is a schematic model; it does not decide whether a lesson suits you, prescribe exercise or diagnose anything. Stop if you feel pain or discomfort.
Sources, supervision and revisions